是时候用docker的方式构建一个应用了。我们首先从应用结构的最底层(容器)开始。在容器层上面是服务层,定义了容器在生产环境下的表现,在最上层是栈,定义了所有服务之间的交互关系。
应用结构如下:
- 栈
- 服务
- 容器(我们现在在这个位置)
崭新的开始环境
在这之前,如果你要开始开发一个python应用,首先要在自己的机器上搭一个python运行环境。但是,这样的话,服务器上的python运行环境也必须和你开发机器上的环境一致。
有了Docker,你可以使用镜像的方式获取python环境,不需要安装,你可以在这个环境下开发你的应用,并把应用集成进这个镜像中,这样应用、运行环境和依赖库都在一个统一的地方,可以在部署时一起移动。
这个可移动的镜像可以通过一个名为Dockerfile的文件来定义。
用Dockerfile来定义容器
Dockerfile定义在容器内部执行的步骤。访问资源如网络接口以及磁盘驱动器可以在容器内部进行,这就隔离了与其它系统的交互。但是为了真正的访问外部世界,你需要做一些端口映射和文件拷贝工作从而与外部世界建立联系。只要这一过程完成,你就可以确保你的应用在任何地方运行都是一致的。
首先创建一个空目录,然后在这个目录下面建立一个名为Dockerfile的文件。注意下面文件内容中的注释,可以帮你更好的理解工作原理:
# Use an official Python runtime as a parent image
FROM python:2.7-slim

# Set the working directory to /app
WORKDIR /app

# Copy the current directory contents into the container at /app
ADD . /app

# Install any needed packages specified in requirements.txt
RUN pip install -r requirements.txt

# Make port 80 available to the world outside this container
EXPOSE 80

# Define environment variable
ENV NAME World

# Run app.py when the container launches
CMD ["python", "app.py"]
这个Dockerfile中引用到的一些其它文件像app.py和requirements.txt还没有提到。我们在接下来的部分中创建它们。
应用本身
把下面的两个文件放在与Dockerfile相同的目录下。那两个文件就是我们完整的应用,实现过程很简单。当我们要创建镜像时,app.py和requirements.txt文件会被放入镜像中,因为我们使用了指令ADD,同时,应用的输出也会被外部访问到,因为我们使用指令EXPOSE暴露了端口至外部。
requirements.txt
Flask
Redis
app.py
from flask import Flask
from redis import Redis, RedisError
import os
import socket

# Connect to Redis
redis = Redis(host="redis", db=0, socket_connect_timeout=2, socket_timeout=2)

app = Flask(__name__)

@app.route("/")
def hello():
    try:
        visits = redis.incr("counter")
    except RedisError:
        visits = "<i>cannot connect to Redis, counter disabled</i>"

    html = "<h3>Hello {name}!</h3>" \
           "<b>Hostname:</b> {hostname}<br/>" \
           "<b>Visits:</b> {visits}"
    return html.format(name=os.getenv("NAME", "world"), hostname=socket.gethostname(), visits=visits)

if __name__ == "__main__":
    app.run(host='0.0.0.0', port=80)
现在我们来看Dockerfile文件里的指令pip install -r requirements.txt安装了依赖库Flask和Redis,并且应用的输出是打环境变量NAME和通过调用命令socket.gethostname()来输出机器名称。由于Redis还没有运行起来,我们的应用如果此时被运行,应该是会失败并产生错误信息输出。
注意:在容器内部获得的机器名称是容器的ID,这个ID类似于进程ID。
构建应用
宿主系统上不需要安装python和requirements.txt中所列的依赖,这些东西也不会在构建过程中安装在宿主系统上。这看上出不可能,但你确实已经可以建立起一个应用的开发环境了。
先来看下目录下面有什么内容:
$ ls
Dockerfile        app.py            requirements.txt
下面我们运行构建命令来建立我们的Docker镜像。我们使用-t选项为我们构建的镜像指定一个友好的名称,方便之后的使用。
$ docker build -t friendlyhello .
运行成功后,构建的镜像会在你本地的Docker镜像登记处。以下命令查看:
$ docker images
REPOSITORY              TAG                 IMAGE ID            CREATED                  SIZE
friendlyhello           latest              dd76f8897238        Less than a second ago   194MB
运行应用
使用下面的命令将宿主机的4000端口映射到容器的80端口,-p选项可以用来指定端口映射:
$ docker run -p 4000:80 friendlyhello
 * Running on http://0.0.0.0:80/ (Press CTRL+C to quit)
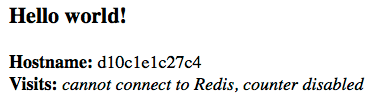
你会看到我们的python应用在http://0.0.0.0:80地址向外部提供服务。但是容器的内部端口80已经被映射为宿主机的4000端口,所以我们需要访问:http://localhost:4000,我们会看到下面的场景:
你也可以使用命令行来访问我们的应用:
$ curl http://localhost:4000
<h3>Hello world!</h3><b>Hostname:</b> d10c1e1c27c4<br/><b>Visits:</b> <i>cannot connect to Redis, counter disabled</i>
注意:
EXPOSE指令只是告诉容器向外部暴露的端口。
-p 4000:80是把容器的80端口映射为宿主机的4000端口。
docker run -p会默认把EXPOSE的80端口映射为宿主机的80端口。
使用-d选项可以让容器以非阻塞的方式在后台运行,例如:
$ docker run -p -d 4000:80 friendlyhello
2ee89a76e20b3d2e1aed89d3bd1dff40280a8649abdf756252fe334ece39f057
使用docker ps来查看当前正在运行的所有容器。使用docker stop <CONTAINER ID>来停止容器的运行。
$ docker ps
CONTAINER ID        IMAGE                          COMMAND                  CREATED             STATUS              PORTS                            NAMES
2ee89a76e20b        friendlyhello                  "python app.py"          8 seconds ago       Up 55 seconds       0.0.0.0:8001->80/tcp             relaxed_pare


$ docker stop 2ee89a76e20b
2ee89a76e20b
分享你创建的镜像给它人
为了证明你刚创建的镜像的可移植性,我们把它上传到登记处吧。
登记处是仓库的集合地,仓库是镜像的集合。在登记处创建一个帐号后,就可以上传一些仓库了。dockerCLI默认使用Docker的公共登记处。
注意: 我们使用Docker公共登记处只是因为它免费并且已经预先配置好了。我们当然可以选择其它的登记处来上传,也可以使用Docker Trusted Registry自己搭建私有登记处。
如果你在https://hub.docker.com上面创建过帐号,你可以使用那个帐号来登录并上传你的镜像。
$ docker login
Login with your Docker ID to push and pull images from Docker Hub. If you don't have a Docker ID, head over to https://hub.docker.com to create one.
Username (zhulongyixian):
Password:
Login Succeeded
emh1bG9uZ3lpeGlhbjpXdzU0Mzg1OTIzMAo=
给镜像打标签
给本地镜像打标签的格式是:username/repository:tag,tag是可选的, 默认为latest。username是你在登记处的帐户名称,repository是你在登记处自己帐号下面创建的仓库名称,tag就是你给镜像所打的标签了,可以用来作版本控制。
$ docker tag friendlyhello zhulongyixian/hello:v1.0
运行docker images来查看镜像:
$ docker images
REPOSITORY              TAG                 IMAGE ID            CREATED             SIZE
friendlyhello           latest              c44e612afbaf        About an hour ago   194MB
zhulongyixian/hello     v1.0                c44e612afbaf        About an hour ago   194MB
发布你的镜像
$ docker push zhulongyixian/hello:v1.0
The push refers to a repository [docker.io/zhulongyixian/hello]
66ff03c1986b: Pushed
11d6afaa575f: Pushed
258c807552a6: Pushed
735a46068813: Mounted from library/python
2323e4886d1c: Mounted from library/python
3dd73719e600: Mounted from library/python
2c40c66f7667: Mounted from library/python
v1.0: digest: sha256:8fbd239f550124a129ba0874c1634ac4c4b64835f544b66514eb579e00bfd5d4 size: 1787
一旦完成发布,你就可以在docker hub上面看到它,其它人也可以拉取你的镜像到自己的本地运行服务。
拉取你的镜像在其它地方运行
docker run -p 4000:80 zhulongyixian/hello:v1.0
注意:如果不指定tag,docker默认会使用latest来拉取镜像
常用指令列表
docker build -t friendlyname .  # Create image using this directory's Dockerfile
docker run -p 4000:80 friendlyname  # Run "friendlyname" mapping port 4000 to 80
docker run -d -p 4000:80 friendlyname         # Same thing, but in detached mode
docker ps                                 # See a list of all running containers
docker stop <hash>                     # Gracefully stop the specified container
docker ps -a           # See a list of all containers, even the ones not running
docker kill <hash>                   # Force shutdown of the specified container
docker rm <hash>              # Remove the specified container from this machine
docker rm $(docker ps -a -q)           # Remove all containers from this machine
docker images -a                               # Show all images on this machine
docker rmi <imagename>            # Remove the specified image from this machine
docker rmi $(docker images -q)             # Remove all images from this machine
docker login             # Log in this CLI session using your Docker credentials
docker tag <image> username/repository:tag  # Tag <image> for upload to registry
docker push username/repository:tag            # Upload tagged image to registry
docker run username/repository:tag                   # Run image from a registry